Download Nvidia GeForce Experience for Windows 10 PC
Discover how to download, install, update, uninstall, reinstall, or disable Nvidia GeForce Experience on your Windows 10 system with this comprehensive guide. Resolve issues like Nvidia GeForce Experience not working or missing. For additional computer tips and solutions, visit the GadgetsBreak website, your hub for tech solutions and insights. Explore the world of Nvidia GeForce Experience for enhanced gaming and graphics capabilities.
What Is GeForce Experience?
GeForce Experience, a complimentary application by Nvidia, offers an array of functionalities. Its primary features encompass the capability to record and share videos, gameplays, screenshots, and livestreams. It ensures that Nvidia drivers are up to date, optimizes game settings for an exceptional gaming experience, and enhances the performance of applications on your PC. Available for Windows 10/8/7, GeForce Experience serves as an invaluable tool for Nvidia graphics card users.
How to Download Nvidia GeForce Experience on Windows 10 PC?
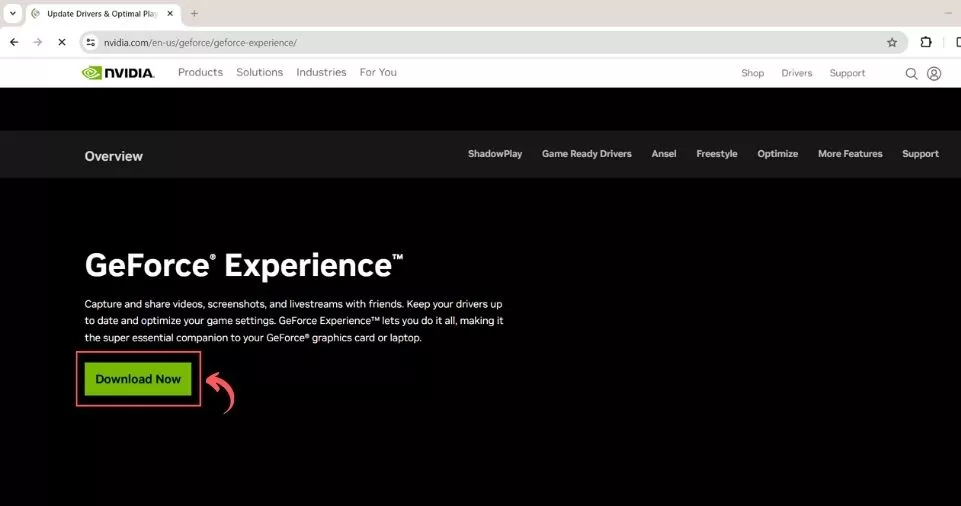
To access the GeForce Experience application, individuals with an Nvidia graphics card can download it free of charge from the official website. Simply visit the GeForce Experience website and click the prominent “Download Now” button to acquire the installation file swiftly. Once the download completes, proceed to run the setup executable file for the installation on your Windows 10 computer.
GeForce Experience is adept at automatically identify, download, and update Nvidia drivers. It’s obtainable from the GeForce Drivers website, where users can manually search for all GeForce drivers by providing their system and graphics card details.
Moreover, for those seeking the latest version or interested in exploring the features in both newer and older versions, the following website provides the opportunity to download GeForce Experience and review release notes: Nvidia GeForce Experience Download. Enhance your gaming and overall system performance with the myriad capabilities of GeForce Experience.
How to Open Nvidia GeForce Experience?
After installation of GeForce Experience on your PC, you can access it by double-clicking its shortcut icon. If the shortcut is not visible, simply click on the “Start” button, search for “Nvidia GeForce Experience,” and open it. An additional method involves right-clicking the Nvidia Settings icon located in the system tray, then selecting “Nvidia GeForce Experience” to launch the application.
How to Update GeForce Experience on Windows 10 PC?
For users seeking the most recent version of the Nvidia GeForce Experience app, visit the official GeForce Experience website for the latest release.
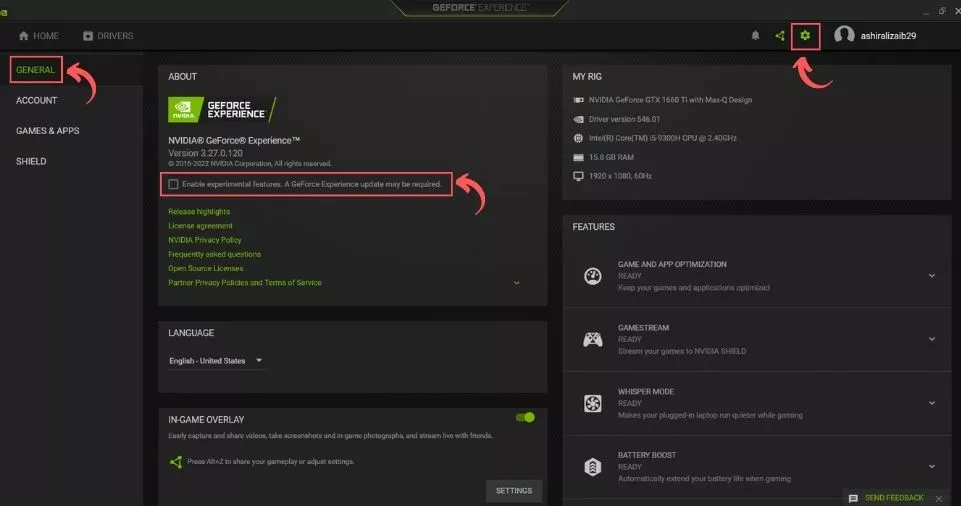
You can also update GeForce Experience app through the app window. Here are the steps to follow to update the GeForce Experience app:
- Open the GeForce Experience app on your PC.
- Click on the Settings icon on the top-right side of the app.
- Click on the General from side options.
- Now select the “Enable experimental features. A GeForce Experience update may be required” option.
- This feature allows access to the latest experimental functionalities within the application.
Stay up to date with the newest features and improvements in Nvidia’s GeForce Experience for an enhanced user experience.
How to Uninstall/Reinstall GeForce Experience on Windows 10 PC?
To uninstall and subsequently reinstall the GeForce Experience application, follow these methods:
Method 1: Uninstall via Settings
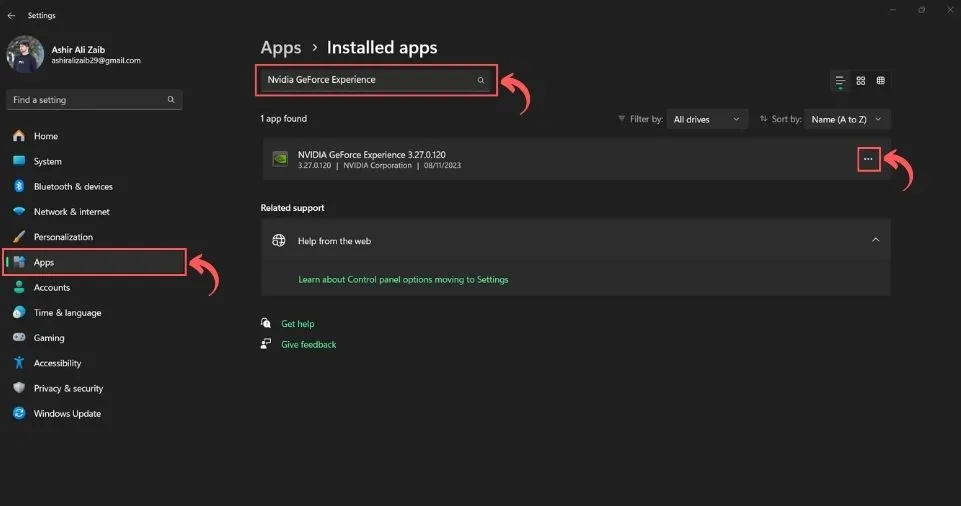
- Click “Start” -> “Settings.”
- Select “Apps” -> “Installed apps.”
- Use search box and write “Nvidia GeForce Experience” and click on three dots on right side of the option. Click the “Uninstall” button to remove it.
Method 2: Uninstall via Control Panel

- Press Windows + R, type “control panel,” and press Enter to open control panel on Windows 10.
- Click “Uninstall a program” under “Programs.”
- Right-click on “Nvidia GeForce Experience Application” and select “Uninstall” to remove it from your PC.
After uninstalling Nvidia GeForce Experience on your Windows 10 computer, you can visit its official website to download the latest version of GeForce Experience.
How to Disable GeForce Experience on Startup on Windows 10 PC?
To disable GeForce Experience from starting up, employ these methods:
Method 1: Using Task Manager
- Press Ctrl + Shift + Esc keyboard shortcut to open Task Manager.
- Click the “Startup” tab.
- Locate “Nvidia GeForce Experience” and click “Disable.”
Method 2: Via Windows Services
- Press Windows + R, type “services.msc,” and press Enter to open Windows Services.
- Right-click “Nvidia GeForce Experience Service” and select “Properties.”
- Choose the “Disabled” option next to “Startup type.” Click “Apply” and then “OK.”
- Restart your computer to implement the changes effectively.
Utilize these methods to either uninstall and reinstall or disable Nvidia GeForce Experience, offering control and flexibility in managing this application’s functionality on your system.
How to Fix Nvidia GeForce Experience Not Working or Missing on Windows 10 PC?
If Nvidia GeForce Experience is not functioning or is missing from your Windows 10 computer, try these tips to resolve the issue:
Fix 1: Uninstall and Reinstall GeForce Experience: Follow the provided guide to uninstall and reinstall GeForce Experience, as mentioned earlier.
Fix 2: Temporarily Disable Antivirus Software: Temporarily disable your antivirus software to check if it is interfering with GeForce Experience.
Fix 3: Restart GeForce Experience Service: Access Windows Services, locate Nvidia GeForce Experience Service, and select “Restart” to refresh the service, as detailed in the previous operations.
Fix 4: Update Nvidia Graphics Card Driver: Press Windows + X, choose “Device Manager,” expand “Display adapters,” right-click on your Nvidia graphics, and select “Update driver” to ensure you have the latest driver installed.
Implement these steps to troubleshoot and potentially resolve issues related to Nvidia GeForce Experience on your Windows 10 system, ensuring its smooth operation and functionality.
How to Update Nvidia Drivers with GeForce Experience on Windows 10 PC?
Once Nvidia GeForce Experience is downloaded and installed on your Windows 10 computer, it automatically handles the process of checking and updating Nvidia drivers for you.
Alternatively, you can manually update the drivers in the following ways:
- Nvidia Control Panel Option: Right-click on the desktop screen and select “Nvidia Control Panel.” Then navigate to the “Help” menu and click on “Updates.”
- System Tray Option: Right-click the Nvidia logo in the system tray and select either “Check for updates” or “Update preferences” to initiate Nvidia driver updates.
How to find GeForce Experience Download Location on Windows 10 PC?
Nvidia typically stores the graphics card driver installation files in the directory: C:\ProgramData\NVIDIA Corporation\Downloader. If the “ProgramData” folder is not visible on your computer, it might be hidden. Learn how to reveal hidden files and folders in Windows 10 to access this location and manage downloaded driver files.
You may also like reading: