How to Set Up Your New Smart Device in Minutes
Smart devices have revolutionized the way we interact with our homes, offices, and everyday environments.
Whether it’s a smart speaker that responds to voice commands, a thermostat that learns your temperature preferences, or a security camera that streams live footage to your phone, smart devices make life more convenient and efficient.
However, setting up these devices for the first time can seem daunting, especially with the abundance of features and integrations they offer. The good news?
With the right approach, you can get your new smart device up and running in just minutes.
This guide will walk you through every step of the process—from unboxing to connecting to your smart ecosystem—and ensure a seamless experience.
Let’s dive in and transform your new gadget into a fully functional part of your daily life.
Step by Step Guide to Set Up Your New Smart Device

Step 1: Unbox and Inspect Your Device
The first step in setting up any new smart device is to carefully unbox it and inspect all components.
Manufacturers typically package their devices with everything you need to get started, but it’s essential to ensure that no parts are missing or damaged.
Check the Components:
Open the box and remove all items. Look for components like power cables, batteries, adapters, manuals, or any additional accessories.
Refer to the instruction manual or the “what’s included” section on the packaging to confirm you have everything.
Inspect for Damage:
Examine the device and its components for any visible signs of damage, such as cracks or loose parts. If you notice any issues, contact the manufacturer or retailer immediately for a replacement.
Keep Packaging Intact:
Until you’re confident the device works correctly, save all packaging materials. This can be useful for returns or exchanges if necessary.
Why This Step Is Important
Unboxing and inspecting your device might seem straightforward, but it’s a crucial part of ensuring a smooth setup process. Missing components or damaged parts can lead to unnecessary delays or malfunctions.
Step 2: Power Up Your Device
Once you’ve confirmed that all components are intact, the next step is to provide your smart device with power.
Depending on the device, this may involve plugging it into an outlet or charging its internal battery.
- For Plug-in Devices: Connect the device to a power source using the provided cable or adapter. Ensure the outlet is functioning properly.
- For Battery-Powered Devices: Insert the batteries or charge the device fully before proceeding with the setup. Use only the charger provided by the manufacturer to avoid compatibility issues.
Pro Tip
Place the device in the location where it will be used before powering it on. This minimizes the need to relocate it later, which could disrupt the setup process.
Step 3: Download the Companion App
Most smart devices require a companion app for setup and management.
This app serves as the control center for your device, allowing you to customize settings, connect to other devices, and receive updates.
Find the App:
Search for the manufacturer’s app in the Google Play Store or Apple App Store. Popular apps include Google Home, Alexa, and SmartThings.
Install the App:
Download and install the app on your smartphone or tablet. Ensure your device’s operating system is compatible with the app.
Create an Account:
If the app requires registration, create an account using your email address. Use a strong, unique password for security.
Why This Step Matters
The companion app is essential for unlocking the full potential of your smart device. It’s also where you’ll manage firmware updates, troubleshoot issues, and explore advanced features.
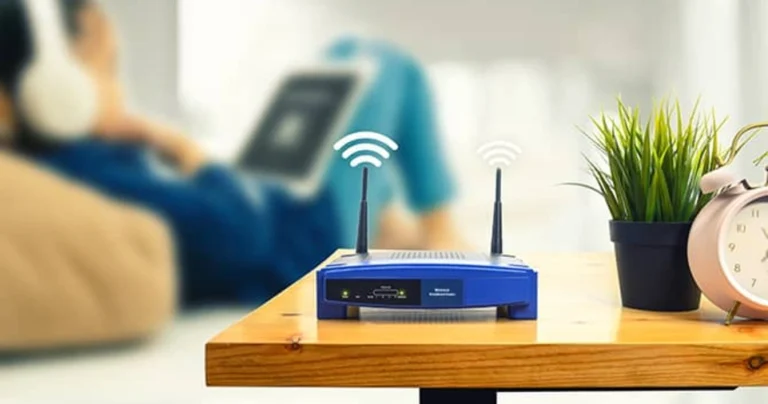
Step 4: Connect to Your Wi-Fi Network
A stable Wi-Fi connection is crucial for most smart devices to function properly.
Here’s how to connect your device to your network:
- Open the App: Launch the companion app and select the option to add a new device.
- Follow Instructions: The app will guide you through the process of connecting to your Wi-Fi network. This usually involves selecting your network from a list and entering the password.
- Verify Connection: Once connected, the app will confirm the device’s successful integration with your network.
Troubleshooting Tips
- Ensure your device is within range of your Wi-Fi router.
- Use a 2.4 GHz network if your device doesn’t support 5 GHz.
- Restart your router if the connection fails.
Step 5: Pair Your Device
Pairing your smart device is a critical step in integrating it into your home environment.
This process ensures that the device communicates effectively with your companion app and other smart devices.
- QR Code Scanning: Some devices require you to scan a QR code located on the device or in the manual.
- Manual Pairing: Others may prompt you to enter a pairing code displayed on the device’s screen.
- Button Press: Certain devices require pressing a specific button (e.g., “Pair” or “Sync”) to establish a connection.
What to Do If Pairing Fails
- Restart the device and the app.
- Check for app or firmware updates.
- Reset the device to its factory settings and try again.
Step 6: Configure Device Settings
Now that your device is paired and connected, it’s time to customize its settings.
The companion app provides options to tailor the device to your specific needs and preferences.
- Explore Features: Navigate through the app to explore features such as notifications, automation, or scheduling.
- Set Preferences: Adjust settings like volume, brightness, or temperature thresholds.
- Test Functionality: Perform a quick test to ensure the device responds correctly to commands.
Example Settings
- Smart lights: Set schedules for turning on and off.
- Security cameras: Enable motion detection alerts.
- Smart thermostats: Create temperature presets for different times of the day.
Step 7: Update Firmware
Firmware updates are essential for maintaining your device’s security and functionality.
Most companion apps notify you when an update is available.
- Check for Updates: Open the app and look for a “Firmware Update” option.
- Install Updates: Follow the on-screen instructions to download and install the update. Ensure the device remains powered on during this process.
Why Updates Are Important
Firmware updates often include bug fixes, security patches, and new features, enhancing the overall performance of your smart device.
Step 8: Integrate with Smart Ecosystems
If you use a smart assistant like Alexa, Google Assistant, or Apple HomeKit, integrating your new device can add convenience and functionality.
- Enable Skills or Actions: Open your smart assistant’s app and enable the corresponding skill or action for your device.
- Link Accounts: Log in to your device’s account through the smart assistant’s app to establish a connection.
- Test Voice Commands: Try commands like “Hey Google, turn on the lights” or “Alexa, play music on my smart speaker.”
Integration Benefits
- Centralized control of multiple devices.
- Voice-activated commands for hands-free operation.
- Compatibility with automation routines (e.g., “Good Morning” or “Bedtime”).
Step 9: Position Your Device
The placement of your smart device can significantly impact its performance.
Consider the following factors:
- Wi-Fi Signal Strength: Ensure the device is within range of your router.
- Environmental Factors: Avoid placing devices near metal objects or walls that could block signals.
- Accessibility: Position the device in a convenient location where it can be easily accessed or interacted with.
Examples of Ideal Placements
- Smart cameras: Corners with a wide field of view.
- Smart speakers: Central locations for optimal voice recognition.
- Smart thermostats: Away from heat sources or drafts.
Step 10: Perform a Final Test and Enjoy
With everything set up, it’s time to test your device and start enjoying its features.
Perform a thorough functionality check:
- Test Basic Functions: Use the companion app to activate the device’s primary features.
- Check Automation: Verify that any schedules or routines you’ve created work as intended.
- Explore Advanced Features: Take time to familiarize yourself with the device’s full range of capabilities.
Celebrating Success
Congratulations on successfully setting up your smart device! You’re now ready to enjoy the convenience and innovation it brings to your daily life. Don’t forget to explore additional integrations and features to maximize its potential.
ALSO READ:
Conclusion
Setting up a new smart device doesn’t have to be a complicated process.
By following these detailed steps, you can ensure a smooth and efficient setup, allowing you to enjoy the full benefits of your smart technology in no time.
Whether you’re connecting a single device or building a complete smart home ecosystem, these guidelines will help you every step of the way.
Happy smart living!